Sign up for Organizing Tips, straight to your inbox!
Easy Memory Books
Make these Easy Memory Books by organizing just one or two sets of photos. Start by choosing one theme, party or event and make a small Memory Book if this is your first time.
Once you get a little practice making small Memory Albums, then you may feel more confident about making ones that are larger and more involved.
A Simple-To-Follow System for
Creating Easy Memory Books
Supplies needed...
- Photo Organizing Box
- Photo-Safe Adhesive
- Themed Stickers/Letter and Number Stickers
- Decorative and Regular Scissors
- Photo Safe Pen
- Colored Scrapping Paper/Mounting Paper
A scrapbook storage system will also come in handy for organizing your supplies or toting them to scrapbooking parties.
Gather Your Photos
Gather photos from a party or special event to use for this Easy Memory Book, or plan to shoot an entire roll of film at an upcoming party or event to use specifically for this Easy Memory Book.
As you take your photos, pay attention to the background. Use your zoom lens for close-ups and fill the frame with your subject. Take pictures in logical sequence and think about the story you are going to tell in your Memory Book as you photograph.
Have your photos scanned/developed in either 3 1/2 X 5 or 4 X 6 size. A small Memory Book will hold one 4 X 6 or two cropped 3 1/2 X 5 photos per page. Eliminate any under or over-exposed photos.
With a photo-safe pen, write as much information on the back of each photo as possible: who, what, when, where why.
If you have two sets of prints developed, separate them and write on the backs of one set. Put a small "x" on the backs of each extra print and place these and the negatives in a clear plastic photo protector envelope. Write the date and a brief description on the outside of the envelope and place it in the bottom of your Photo Organizing Box. You will come back to these later.
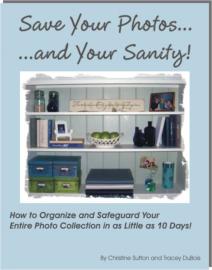
By the way, if you've been wanting to organize your photos but doing so seems too overwhelming, check out Save Your Photos......and Your Sanity. You'll learn how to organize your entire photo collection in as little as 10 days. Author's Chris Sutton and Tracy DuBois use stories, exercises, and lots of humor in their e-book which make the process not just manageable but enjoyable too.
For now though, you just need a themed batch or two from a recent special event to make your easy memory book and get you motivaged to organize those photos!
Start Easy Memory Book
Now you are ready to start your Easy Memory Book!
Spread out your photos and choose the best ones to put in your Easy Memory Book. Put these photos in the order of the story you are telling, (i.e., arrival of guests at the party through gift opening).
Open Your Memory Book and begin by creating a Title Page using letter and number stickers. Keep the title simple and to the point. For example...
It's About Time To Organize Your Photos
Turn the page and lay out your first one or two photos in a way that appeals to you. Make sure to leave room for journaling. There are many ways to position photos on a page, i.e., slanting or overlapping them. Choose a few different types of layouts and alternate them through your book. As you lay out your pages, keep in mind that you want attention drawn to the photos first. Journaling and accents are important but should not overcrowd the page.
Try These Ideas...
- Photos Can be Slanted Or Scattered
- Creative Pretty Edges With Decorative Scissors
- Use Your Own Handwriting... Your Loved Ones Identify Your Handwriting To You
- Small Photos Can Be "Framed" To Add A Unique Look
How To Layout The Pages
Choose some colored mounting paper and using decorative scissors, cut some background pieces to be used under each photo. Keep your color scheme consistent throughout the book.
You can add corners, borders and/or simple accents. Lay out colored accents with the photo on top to get a "visual" before mounting. Remember, the photos are the essence of the story you are telling. Everything on the page, including your journaling should enhance the photos.
When you are happy with your first page layout, take the photo adhesive and glue everything in place.
After your photos are positioned, think about your journaling. You can use your own handwriting or type them on a computer. If handwriting, journal on a coordinating piece of paper which will allow you to re-write if necessary. Record interesting details and humorous anecdotes if it seems fitting.
Make sure the paper fits on the designated journaling space. Consider trimming your journaling paper with decorative scissors before mounting.
Journaling should be kept to as little as one descriptive word to a sentence or two. Again, remember to keep attention drawn to the photos.
Go on to the next page and repeat these steps. Try to complete your Easy Memory Book in one session.
Remember The Extra Photos
Return to your Photo Organizing Box and retrieve the photo protector envelope. Label the envelope with the same title you used for your Easy Memory Book and write the names of anyone that you might like to give your extras to. The next time you are going to see them, they will be easy to retrieve. No more searching!
Display Your Memory Book For All To Enjoy!
Using a small Memory Book is a great way to become acquainted with creating Memory Books. The small size is perfect for highlighting any memorable event and is much less overwhelming to do. After completing one or two small books, you may want to consider doing a larger memory book for your child's school years, sports, activities, genealogy mementos and many other memories.
There are many wonderful Memory Book choices available at craft and specialty shops like Scrapbooking and Photography stores.
Replenish Your Supplies
When you are ready to create your next Memory Book, be sure to replenish your supplies (check the supply list!), keeping everything in your Photo Organizing Box. Having all your materials together will help you to stay organized!
 |
 |
sign up for Organizing Tips, straight to your inbox!
Recent Articles
-
Home Organize It Organizing Solutions for Your Stage of Life
Jan 14, 22 02:05 PM
 Home Organize It is where you'll find organizing guidance and solutions for the second half of life. Help with organizing, decluttering, downsizing and moving.
 -
Going To College - Home Organize It!
Jul 22, 21 12:47 AM
 Going to college organized helps you start out with confidence. Our getting organized for college guide will help you plan, prepare, shop and pack for college so you can arrive to your dorm room ready
 -
Holiday Organizing - Home Organize It!
Jul 22, 21 12:43 AM
Need holiday organizing help? From clutterless gift giving to hosting a stress free Christmas party, you'll find practical holiday organizing tips and ideas.
HOMEORGANIZEIT.COM IS COPYRIGHT © 2004- ALL RIGHTS RESERVED